Installing OpenFOAM on MacOS with Docker
Mac users, rejoice! This guide eliminates the roadblocks to running OpenFOAM on your Mac. Harnessing the power of Docker, we’ll navigate the process of compiling and running OpenFOAM, opening a world of CFD possibilities on your familiar platform.

As a dedicated Macintosh user, I’ve often pondered: Is macOS the ideal environment for development? Without a doubt, the answer is a resounding yes. Gone are the days of relying solely on native Linux workstations for development. Today, developers overwhelmingly prefer the convenience of MacBooks or Windows PCs equipped with Windows Subsystem for Linux (WSL). Both macOS and Linux environments share a Unix-based foundation, making them highly comparable in structure. And what’s a MacBook without its beloved terminal? But let’s set aside our love for Macs for a moment and focus on a pertinent question: What about Computational Fluid Dynamics (CFD) and OpenFOAM? Can macOS serve as a viable option for testing and running simple cases in OpenFOAM? Can you seamlessly run custom solvers and integrate external libraries like PETSc into OpenFOAM? In my experience, the answer is a resounding yes. macOS offers an incredibly convenient development environment. Integrating OpenFOAM into macOS not only provides a consistent CFD environment but also caters to the needs of developers and enthusiasts alike. Whether you’re testing new solvers, experimenting with external libraries, or simply honing your skills, macOS offers a robust platform for exploring the world of Computational Fluid Dynamics.
In the not-so-distant past, running OpenFOAM on anything other than Linux posed quite a challenge. Attempting to run OpenFOAM on Windows or macOS often necessitated virtual machines or dual-boot setups, which, while functional, were cumbersome and counterintuitive. However, with the advent of Windows Subsystem for Linux (WSL) on Windows, many of the hurdles associated with OpenFOAM installation were alleviated. You can find a comprehensive guide on compiling OpenFOAM on WSL in my previous article here. Similarly, on macOS, a comparable setup can be achieved using Docker and containerization. Docker, originally an open-source project, was designed for running, building, and managing software containers to ensure consistent development environments across different operating systems. Containers operate on a simple premise: much like standardized shipping containers streamline global logistics, Docker containers encapsulate code and its dependencies into self-contained environments that can be deployed on any operating system. By packaging your OpenFOAM CFD environment into a Docker container, you gain the flexibility to run OpenFOAM seamlessly across diverse platforms.
Note: Before proceeding further, a word of caution: if your OpenFOAM simulations demand maximum performance from your hardware, Docker may not be the optimal solution. While Docker facilitates cross-platform compatibility, it does come with certain limitations. For instance, running Paraview or VisIt within a Docker environment can be cumbersome, and integrating external solvers like PETSc poses its own challenges.
With that said, let’s dive into the intricacies of leveraging Docker for OpenFOAM on macOS!
Installing Docker
Firstly, if you haven’t already installed Homebrew, let’s get that set up. Open a terminal and execute the following command:
/bin/bash -c "$(curl -fsSL https://raw.githubusercontent.com/Homebrew/install/master/install.sh)"
This script automates the installation of Homebrew for you. If you’re unfamiliar, Homebrew is a package manager for macOS (and Linux). As their website elegantly puts it, “The script explains what it will do and then pauses before it does it.”
Now, to install Docker, simply type the following command:
brew install docker
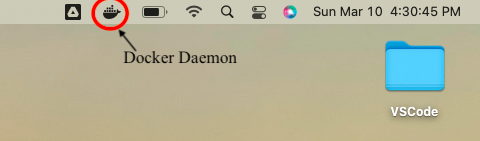
That’s all there is to it. Homebrew will locate and download the Docker package, then run the installer. After installation, you’ll just need to follow the Docker GUI for the initial configuration. To verify the installation, execute docker --version in the terminal. The output should display something like Docker version 25.0.3, build 4debf41. If the command doesn’t return a version number, start the Docker daemon first. You can do this by searching for Docker in Spotlight or navigating to the Application folder in Finder and launching it. When Docker is running, you should see its icon in the status bar.
Preferences
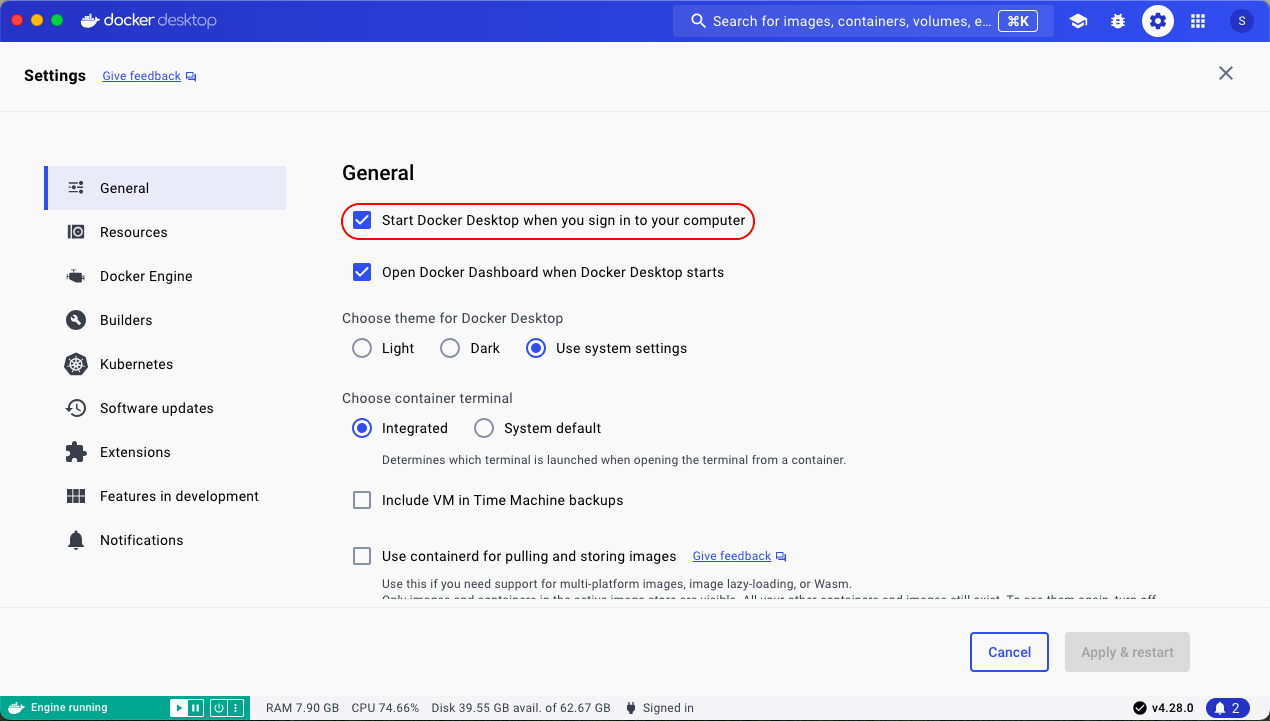
After installing Docker, you can begin using it right away or customize it to suit your preferences. Here are some settings I find helpful for streamlining my workflow. Click on the small gear-shaped icon on the Docker daemon or click on the Docker icon in the status bar and navigate to settings. Here, you’ll find options for customization.
Firstly, I opt to have Docker start automatically on start-up, given that I use it daily. In the preferences, I check the box for “Start Docker Desktop when you sign in to your computer.” However, be mindful that enabling this option keeps Docker running in the background, consuming resources. If you only use Docker sporadically, leaving this option unchecked can help conserve resources. Docker typically starts up in just a few seconds.
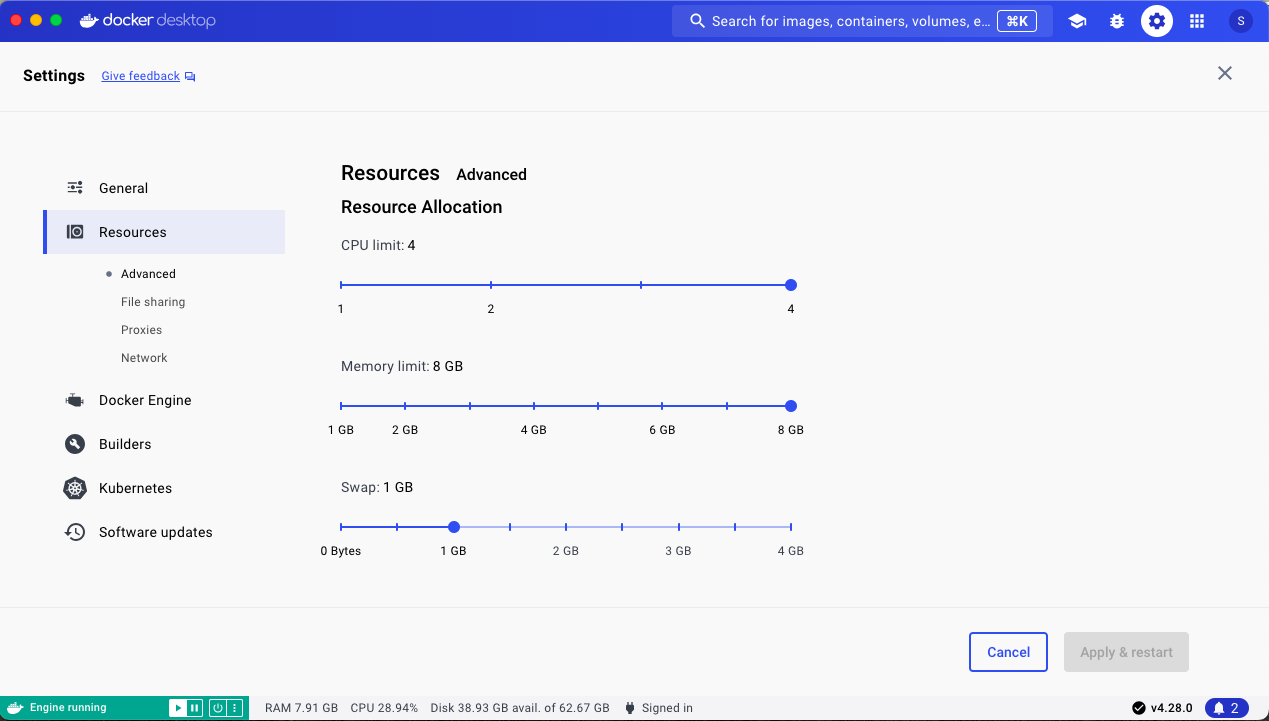
Next, head to the resources section to adjust allocations. Here, you can allocate CPU, RAM, and swap disk space, as well as set the disk size for Docker to use. If you’re only testing, it’s fine to stick with the default settings. However, if you frequently work with multiple containers simultaneously, allocating more resources to Docker makes sense. Personally, I assign all available CPUs and RAM to Docker, as I use it extensively for setting up OpenFOAM cases, testing them, and preparing them for execution on a computing cluster.
Installing OpenFOAM in Docker
Using the pre-built container images
To get started with OpenFOAM in Docker, first, download the OpenFOAM Docker run script from Here and place it at a convenient location. I typically recommend using the /User/userName/OpenFOAM/ folder. (Note: You may need to create the OpenFOAM folder if it doesn’t already exist).
Next, make the script executable and select the OpenFOAM version and image flavors by running the following commands in the terminal:
chmod +x openfoam-docker
ln -sf openfoam-docker openfoam2312-default
In this example, I’ll select OpenFOAM version 23.12 and the -run image. Here’s a brief overview of the available images:
-
-run:This image is small in size and designed for runtime usage only. It includes essential components of OpenFOAM, such as solvers, utilities, and libraries, but excludes tutorials and code modification capabilities. -
-dev:Slightly larger in size, this image includes the minimalist package along with the developer package, enabling code modifications. Tutorials are still not included in this image. -
-default:This image is the just-give-me-everything package, containing all available components.
These images utilize the latest Ubuntu LTS version to ensure a relatively small basic container size (around 80 Mb). However, their sizes vary significantly, with the -run image being the smallest at about 300 Mb and the -default image being the largest at approximately 1.2 Gb. For development purposes, I recommend the -dev or -default images as they contain a full OpenFOAM development environment, complete with wmake, wclean, and other developmental commands.
Now, let’s verify that the script can be executed by running the following command:
./openfoam-docker -help
./openfoam-docker -help-full
Don’t forget to include ./ before openfoam-docker, otherwise, the command won’t execute. Before running the Docker, let’s see how the script calls Docker without actually executing anything by using ./openfoam-docker -dry-run. The output should resemble the following:
docker run --rm -t -i --user=1000:1000 --volume=/home/goswami/OpenFOAM:/home/openfoam opencfd/openfoam-default:latest
Let’s break down what this command does. We’re attempting to run a Docker image named opencfd/openfoam-run:latest. The --rm flag specifies to automatically remove the container after we’ve finished with it. -ti flags tell Docker to use the container as an interactive terminal, similar to a Linux bash terminal. --user=1000:1000 specifies Docker to run as the given user. Lastly, with the --volume key, Docker is instructed to mount the /home/goswami/OpenFOAM folder on WSL to the /home/openfoam directory in the container. This entire command is encapsulated in the link file we created as openfoam2312-default. Thus, running ./openfoam2312-default command will launch the Docker and initialize the image with an OpenFOAM environment.
To execute the Docker image, navigate to /User/userName/OpenFOAM/ and input the following command:
./openfoam2312-default
This will initiate an interactive shell with the OpenFOAM environment active, with the current local directory mounted within the container. Please note that the initial execution of the script may take longer as the image will be downloaded from Docker Hub.
Lastly, to simplify the process of navigating to the directory and running the script, let’s create an alias in the .bash_profile file. Open a terminal and edit the .bash_profile file using any text editor, such as vim:
vi ~/.bash_profile
Navigate to the end of this file and add the following lines:
alias OF2312='cd /User/userName/OpenFOAM; ./openfoam2312-default'
Now, open a new terminal and type in the alias OF2312 to initiate the OpenFOAM Docker environment!
Building your own docker image
The first method of compiling OpenFOAM in a Docker on your Mac works wonders, but what if you desire a more customized setup than the standard OpenFOAM Docker image? For instance, what if you wish to incorporate external solvers like PETSc? PETSc, or the Portable, Extensible Toolkit for Scientific Computation, stands out as a robust tool engineered for the scalable resolution of scientific applications governed by partial differential equations (PDEs). At the heart of PETSc’s versatility lies its organizational structure, tailored around mathematical concepts, making it adept at solving complex systems. Within OpenFOAM, a dedicated library named petsc4Foam is built to access PETSc solvers, such as HYPRE.
In this guide, let’s embark on building a Docker container with PETSc integrated into OpenFOAM.
For such customizations, it’s recommended to construct your container image rather than relying on the standard OpenFOAM image. There are two primary techniques to achieve this: using a Dockerfile or using a base Ubuntu image and compiling OpenFOAM and PETSc within OpenFOAM. Follow this guide for the latter. While the latter method can be cumbersome, the former offers the most reproducible, version-controllable, and transparent approach to image building. For this purpose, you’ll need a Dockerfile similar to the one below:
# ---------------------------------*-sh-*------------------------------------
# Copyright (C) 2021-2022 OpenCFD Ltd.
# SPDX-License-Identifier: (GPL-3.0+)
#
# Add default (tutorials etc) layer onto the openfoam '-dev' (Ubuntu) image.
#
# Example
#     docker build -f openfoam-default.Dockerfile .
#     docker build --build-arg FOAM_VERSION=2306
#         -t opencfd/openfoam-default:2306 ...
#
# ---------------------------------------------------------------------------
ARG FOAM_VERSION=2312

FROM opencfd/openfoam-dev:${FOAM_VERSION}
ARG FOAM_VERSION
ARG PACKAGE=openfoam${FOAM_VERSION}-default
ARG DEBIAN_FRONTEND=noninteractive

SHELL ["/bin/bash", "-c"]

RUN apt-get update \
 && apt-get -y install --no-install-recommends git python3-dev wget vim less \
 && apt-get -y install --no-install-recommends ${PACKAGE} \
 && rm -rf /var/lib/apt/lists/* \
 && cd /usr/lib/openfoam/openfoam2312/ \
 && source etc/bashrc \
 && source etc/config.sh/petsc \
 && rm --force $WM_THIRD_PARTY_DIR \
 && git clone https://develop.openfoam.com/Development/ThirdParty-common $WM_THIRD_PARTY_DIR \
 && cd $WM_THIRD_PARTY_DIR \
 && wget https://ftp.mcs.anl.gov/pub/petsc/release-snapshots/$petsc_version.tar.gz \
 && tar xzf $petsc_version.tar.gz \
 && ./makePETSC -- --download-f2cblaslapack=1 \
 && git clone https://develop.openfoam.com/modules/external-solver $WM_THIRD_PARTY_DIR/external-solver \
 && cd $WM_THIRD_PARTY_DIR/external-solver \
 && ./Allwmake -j 1>stdout.log 2>stderr.log \
 && echo "eval $(foamEtcFile -sh -config petsc -- -force)" >> ~/.bashrc

# ---------------------------------------------------------------------------
This Dockerfile is constructed using a standard container template provided here. You can also download this specific file here. In this instance, we begin with the official openfoam2312-default image, built on top of the Ubuntu Bionic image, and incorporate additional tools required for later use, such as wget, vim, less, python3-dev, etc. Following this, we install OpenFOAM and source the /etc/bashrc and /etc/config.sh/petsc for compiling PETSc in OpenFOAM. Subsequently, the Dockerfile proceeds to build the PETSc library within OpenFOAM and adds the environment variables to the user’s ~/.bashrc file so that PETSc is loaded by default for the user.
PS: Please disregard the formatting of the Dockerfile. Here, multiple commands are combined using the && operator, and for clean code, individual commands are separated onto the next line using the \ operator. This is merely a quirky method to make Docker images slightly smaller.
Place this file inside the /home/goswami/OpenFOAM folder and build the image using the following command:
docker build -t openfoam_custom -f ofpetsc .
This process may take some time (approximately 10-15 minutes), mainly depending on your internet connection and the specifications of your Mac. Upon completion, you’ll have a customized and Dockerized version of OpenFOAM named openfoam_custom. To log into your container, use the command:
docker run --rm -ti -v /home/goswami/OpenFOAM:/home/openfoam openfoam_custom:latest
To expedite the login process, create an alias inside the ~/.bash_profile by executing the following command in your terminal:
echo "alias OFCustom='docker run --rm -ti -v /home/goswami/OpenFOAM:/home/openfoam openfoam_custom:latest'" >> ~/.bash_profile
Don’t forget to close the terminal, open a new one, and simply type OFCustom to log into the new Docker image. And there you have it!
Using OpenFOAM in a Docker container
Building a Docker image and installing OpenFOAM is relatively straightforward, but how you use OpenFOAM in a container depends heavily on how you built the image. To start, let’s delve into the basics of containers, images, and Docker in general.
First, let’s clarify some terminology. The glossary for Docker can be found here, but here’s a brief overview:
- Docker: The platform for developers to develop, ship, and run applications.
- Docker Daemon: The process running on your computer that manages images and containers.
- Dockerfile: A text document containing commands used to build a Docker image. It essentially automates the process of manually entering commands to construct an image.
- Docker image: A collection of code and instructions for the user, such as system libraries and application code.
- Container: The runtime instance of an image, an executable package (e.g., OpenFOAM) that includes everything needed to run an application.
Let’s examine the command to run the container:
docker run --rm -ti -v /home/goswami/OpenFOAM:/home/openfoam openfoam_custom:latest
Now, let’s break down the command:
-
docker run: This command is used to run a Docker container. -
--rm: This flag removes the container automatically once it stops running, preventing them from piling up and consuming disk space unnecessarily. -
-ti: These flags indicate that we want to run the container in an interactive mode, which allows us to interact with the container via the terminal. -
-v /home/goswami/OpenFOAM:/home/openfoam: This flag mounts the local directory/home/goswami/OpenFOAMto the directory/home/openfoaminside the container. This is essential for persisting data between the host and the container. Any data stored in/home/openfoamwithin the container will be accessible on the host machine in/home/goswami/OpenFOAM. -
openfoam_custom:latest: This specifies the image to be used for running the container. In this case, it’s the openfoam_custom image tagged withlatest.
Executing this command fetches the newly created Docker image and starts a container on your local machine. This container places you into a Bash shell, logged in as the root user, with access to all of the OpenFOAM and PETSc libraries within the container. However, it’s important to note that since this container is built on top of Ubuntu, certain functionalities of Linux are retained, but there is one limitation: ParaView cannot be easily run using the paraFoam command from within the container.
Now, let’s discuss the functionality of OpenFOAM within a container. First and foremost, always mount a volume with your Docker image and run your cases on that volume. Any data stored within the Docker container will be lost once you exit the container. Additionally, running serial cases is straightforward. The primary purpose of running OpenFOAM in Docker on your Mac should be for setting up cases and testing them, rather than running them in their entirety. This is how I typically use my Mac for OpenFOAM. Since Tecplot and ParaView can be easily installed on macOS, you can utilize the powerful GPUs of a MacBook for post-processing.
If you absolutely need to run parallel simulations using OpenFOAM on your Mac, you can use the following command:
mpirun --allow-run-as-root -np 4 simpleFoam -parallel | tee log
Here, the --allow-run-as-root option is added to the simple mpirun command for any solver. Since the built image of OpenFOAM with PETSc integrated runs only as the root user, this option allows running multi-core simulations. However, it’s important to proceed with caution, as running mpirun as a root user may pose security risks. If any readers have suggestions on this matter, please feel free to comment on this article.
In conclusion, while macOS has long been favored by developers for its Unix-based environment and intuitive user experience, the integration of OpenFOAM further solidifies its position as a convenient platform for computational fluid dynamics (CFD) enthusiasts. Through the utilization of Docker, the barriers previously associated with running OpenFOAM on non-Linux systems have been effectively overcome. Docker’s containerization technology ensures a consistent and portable development environment, enabling users to seamlessly deploy OpenFOAM and its associated dependencies across various operating systems. With macOS and Docker, developers can enjoy the flexibility and convenience of their preferred environment while exploring the complexities of CFD with OpenFOAM. So whether you’re a seasoned developer or an aspiring enthusiast, macOS coupled with Docker offers a compelling solution for testing, running, and customizing OpenFOAM simulations with ease and efficiency.
Happy computing!!!
Enjoy Reading This Article?
Here are some more articles you might like to read next: